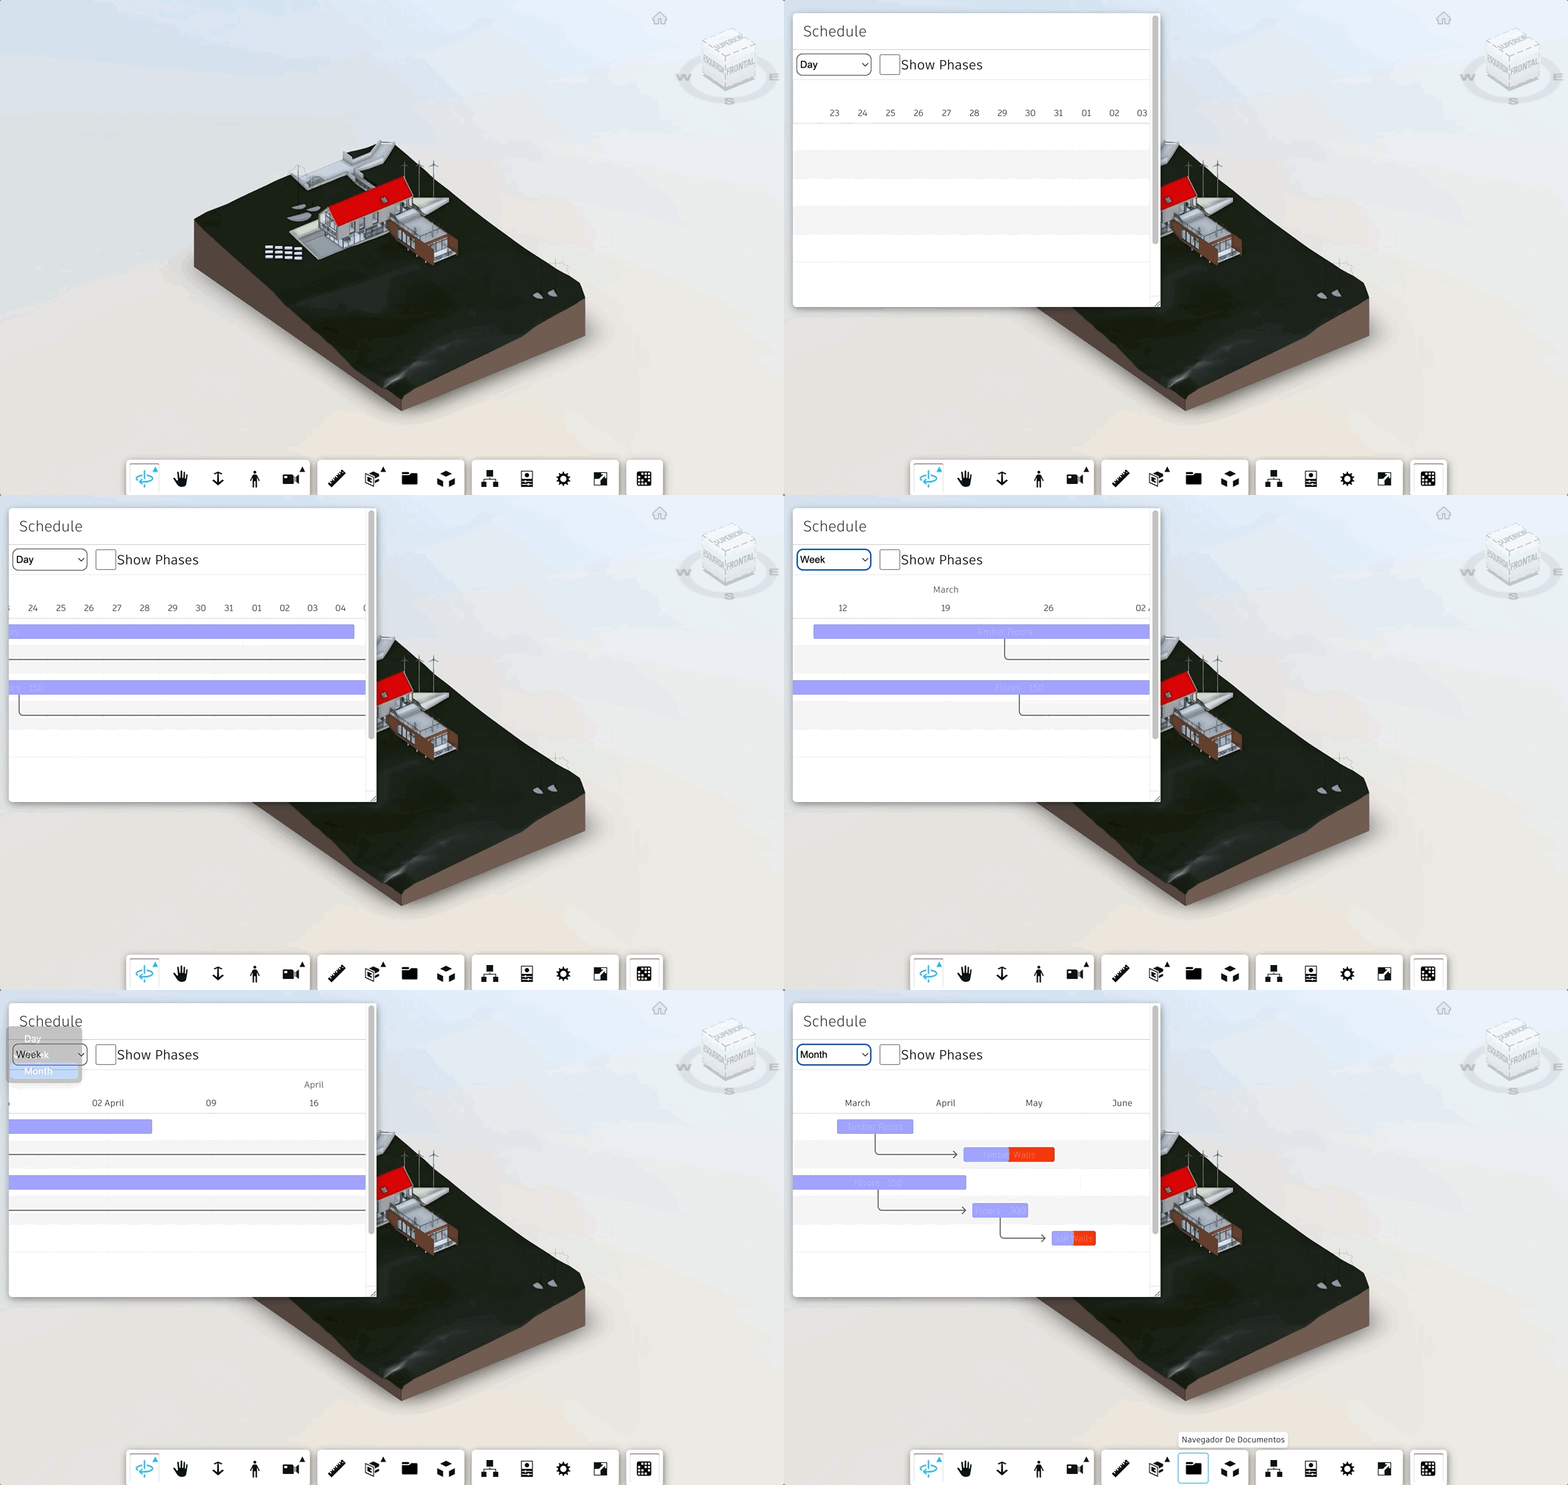
Ajustando a escala
Podemos iniciar esta parte adicionando um dropdown ao nosso painel, especificamente dentro da função initialize da classe PhasingPanel :
...
initialize() {
  this.title = this.createTitleBar(this.titleLabel || this.container.id);
  this.title.style.overflow = 'auto';
  this.initializeMoveHandlers(this.title);
  this.container.appendChild(this.title);

  this.div = document.createElement('div');
  this.container.appendChild(this.div);

  ========START OF THE  ADDITIONAL CONTENT========

  //Here we create a dropdown to control vision of the GANTT
  this.dropdown = document.createElement('select');
  this.dropdown.style.width = (this.options.dropdownWidth || 100) + 'px';
  this.dropdown.style.height = (this.options.dropdownHeight || 28) + 'px';
  this.dropdown.style.margin = (this.options.margin || 5) + 'px';
  this.dropdown.style.verticalAlign = (this.options.verticalAlign || 'middle');
  this.dropdown.style.backgroundColor = (this.options.backgroundColor || 'white');
  this.dropdown.style.borderRadius = (this.options.borderRadius || 8) + 'px';
  this.dropdown.style.borderStyle = (this.options.borderStyle || 'groove');
  for (const viewMode of phasing_config.viewModes) {
    let currentOption = document.createElement('option');
    currentOption.value = viewMode;
    currentOption.innerHTML = viewMode;
    this.dropdown.appendChild(currentOption);
  }

  this.dropdown.onchange = this.changeViewMode.bind(this);
  this.div.appendChild(this.dropdown);

  ========END OF THE  ADDITIONAL CONTENT========

  //Here we create a switch to control vision of the schedule based on the GANTT chart
  this.checkbox = document.createElement('input');
  this.checkbox.type = 'checkbox';
  this.checkbox.id = 'colormodel';
  this.checkbox.style.width = (this.options.checkboxWidth || 30) + 'px';
  this.checkbox.style.height = (this.options.checkboxHeight || 28) + 'px';
  this.checkbox.style.margin = '0 0 0 ' + (this.options.margin || 5) + 'px';
  this.checkbox.style.verticalAlign = (this.options.verticalAlign || 'middle');
  this.checkbox.style.backgroundColor = (this.options.backgroundColor || 'white');
  this.checkbox.style.borderRadius = (this.options.borderRadius || 8) + 'px';
  this.checkbox.style.borderStyle = (this.options.borderStyle || 'groove');

  this.checkbox.onchange = this.handleColors.bind(this);
  this.div.appendChild(this.checkbox);

  this.label = document.createElement('label');
  this.label.for = 'colormodel';
  this.label.innerHTML = 'Show Phases';
  this.label.style.fontSize = (this.options.fontSize || 18) + 'px';
  this.label.style.verticalAlign = (this.options.verticalAlign || 'middle');
  this.div.appendChild(this.label);

  //Here we add the svg for the GANTT chart
  this.content = document.createElement('div');
  this.content.style.backgroundColor = (this.options.backgroundColor || 'white');
  this.content.innerHTML = `<svg id="phasing-container"></svg>`;
  this.container.appendChild(this.content);

  this.updateTasks();
}

========START OF THE  ADDITIONAL CONTENT========
changeViewMode(event) {
  const viewMode = event ? event.target.value : this.currentViewMode;
  this.gantt.change_view_mode(viewMode);
  this.handleColors.call(this);
  this.currentViewMode = viewMode;
}
========END OF THE  ADDITIONAL CONTENT========
...
E para manter o viewmode persistente, precisamos adicionar uma chamada para changeViewMode dentro da função update da classe PhasingPanel:
...
update(model, dbids) {
  if (phasing_config.tasks.length === 0) {
    this.inputCSV();
  }
  model.getBulkProperties(dbids, { propFilter: phasing_config.propFilter }, (results) => {
    results.map((result => {
      this.updateObjects(result);
    }))
  }, (err) => {
    console.error(err);
  });
  if (phasing_config.tasks.length > 0) {
    this.gantt = this.createGanttChart();
    this.handleColors.call(this);
    ========START OF THE  ADDITIONAL CONTENT========
    this.changeViewMode.call(this);
    ========END OF THE  ADDITIONAL CONTENT========
  }
}
...
São utilizados os valores de phasing_config.viewModes do nosso arquivo de configuração para definir as opções de escala. Vamos adicionar as opções disponíveis de acordo com nossa biblioteca (frappe/gantt) dentro do config.js:
export const phasing_config = {
  "propFilter": "Type Name",
  "tasks": [],
  "requiredProps": {
    "id": "ID",
    "taskName": "NAME",
    "startDate": "START",
    "endDate": "END",
    "taskProgress": "PROGRESS",
    "dependencies": "DEPENDENCIES"
  },
  "objects": {},
  "mapTaksNProps": {},
  "statusColors": {
    "finished": "31,246,14",
    "inProgress": "235,246,14",
    "late": "246,55,14",
    "notYetStarted": "",
    "advanced": "14,28,246"
  },
  ========START OF THE  ADDITIONAL CONTENT========
  "viewModes": [
    // "Quarter Day",
    // "Half Day",
    "Day",
    "Week",
    "Month"
  ]
  ========END OF THE  ADDITIONAL CONTENT========
}
E pronto, nosso gráfico de Gantt agora pode ser redimensionado para mostrar as tarefas em dias, semanas ou meses, assim como no gif abaixo!
